Karam Tools Karam Tools

How to Calibrate a Digital Torque Wrench Accurately?

Time:2026-09-20 Author:Mason
0%

Learning how to calibrate a digital torque wrench accurately begins with respecting measurement, not simply pressing a calibration button. In a professional workshop, a wrench may display 100 N·m while the fastener receives something different. Battery condition, temperature, worn ratchet mechanisms, poor hand position, and unsuitable adapters can all influence the result. Small errors matter.

Dr. Richard S. Davis, a respected metrology specialist, states, “A torque reading is only as trustworthy as the complete measurement chain.” That principle guides reliable calibration. The process should use a traceable torque transducer, a stable calibration stand, and the correct measurement range. The wrench must be inspected, zeroed, and tested at several points, rather than checked once at its maximum capacity. ISO 6789 guidance can help, but the manufacturer’s instructions remain essential.

Keep the setup level. Keep the loading smooth. Record every reading.

A careful technician compares repeated values, calculates variation, and checks whether the results meet the required tolerance. Digital displays can create false confidence. They look precise, but precision is not the same as accuracy. This is where many procedures become imperfect. Operators may forget temperature stabilization or apply force too quickly. That weakness deserves honest review.

This guide explains how to calibrate a digital torque wrench accurately, from preparation and equipment selection to repeatability checks and documentation. It also considers when adjustment is appropriate and when professional laboratory calibration is safer. A calibration record should show the date, equipment used, environmental conditions, readings, and final decision. Reliable torque control starts with evidence.
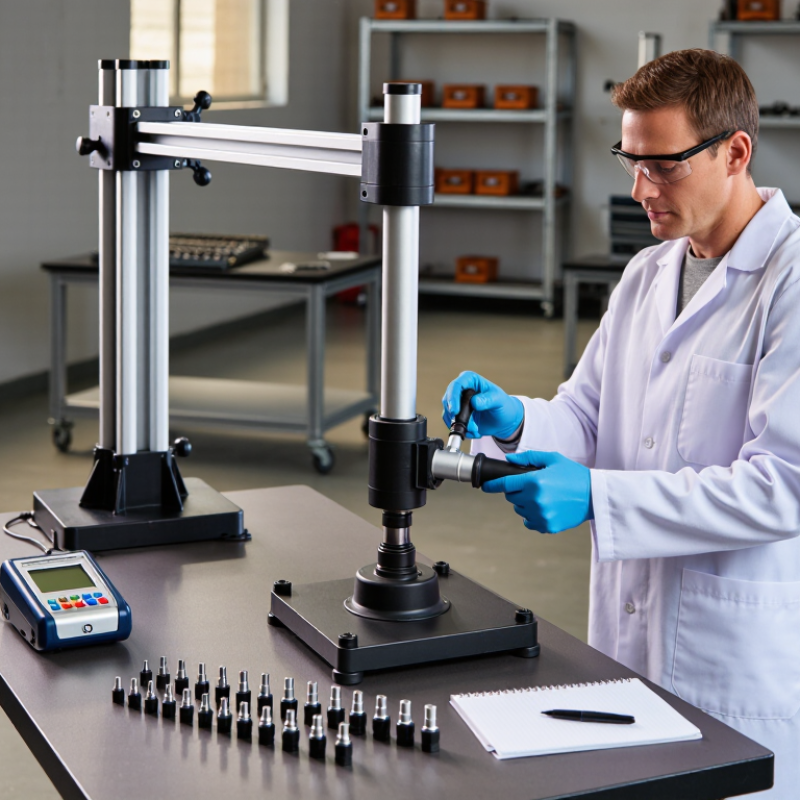
How to Calibrate a Digital Torque Wrench Accurately?

What Digital Torque Wrench Calibration Means

How to Calibrate a Digital Torque Wrench Accurately?

What Digital Torque Wrench Calibration Means

Calibration means comparing the wrench’s readings with a known, traceable torque standard. It does not simply reset the display. The process shows how closely the tool measures applied torque under controlled conditions. A qualified laboratory or trained technician checks several torque points across the working range. Readings are recorded, repeated, and evaluated for error and repeatability. Small differences matter when fasteners require controlled clamping force.

Before testing, inspect the drive, display, battery, and housing for damage. Let the wrench reach room temperature. Mount it squarely on a calibrated torque tester. Apply force slowly and smoothly, without jerking or leaning sideways. Test low, middle, and high settings, often with several repeated readings at each point. Record the “as-found” results before making any adjustment. This record can reveal gradual drift that a quick adjustment might hide.

Calibration is not a magic reset. A wrench may pass in a laboratory and still produce poor results with a bent adapter or careless handling. Temperature, extension length, pulling angle, and operator technique can affect readings. I would not trust one impressive result. Repeated measurements provide better evidence.

If the error exceeds the stated tolerance, adjustment or repair may be necessary. Afterward, test it again and keep the certificate with its date, range, uncertainty, and traceability details.

Tools and Conditions Required for Accurate Calibration

How to Calibrate a Digital Torque Wrench Accurately?

Accurate calibration starts with suitable tools, not guesswork. Use a certified torque transducer, a rigid test stand, and compatible square-drive adapters. The reference device should have current calibration records and traceability to a recognized national standard. A level workbench also matters. Any movement can change the measured torque.

Control the environment before testing. Keep the room near 20–24°C, with stable humidity and no strong airflow. Let the wrench and transducer rest there for at least one hour. Check the battery, display, ratchet head, and drive connection. Clean contact surfaces carefully. Small errors matter. Never hold the wrench by its head during measurement. Keep the handle centered and apply force slowly at the marked grip position.

Set several torque points across the wrench’s working range, rather than checking one value. Take repeated readings in both suitable directions when the procedure requires it. Record the applied value, displayed value, temperature, operator, and equipment identification. I once rushed the warm-up period and obtained inconsistent results. That shortcut was a mistake. Repeating the test exposed the problem, but it also showed that operator technique can affect results. If readings drift, stop and inspect the setup before adjusting the wrench. Follow the applicable calibration procedure, such as the requirements described in ISO 6789, and retain complete records for future verification.

How to Calibrate a Digital Torque Wrench Accurately? - Tools and Conditions Required for Accurate Calibration

Calibration Area Tool or Condition Required Recommended Specification or Setting Example Data for a 20–200 N·m Wrench Accuracy Purpose
Applicable Procedure Documented calibration procedure based on ISO 6789-2:2017 or an equivalent national procedure Define the test method, loading direction, measurement points, repeatability method, uncertainty calculation, and acceptance criteria before testing Procedure ID: DTW-CAL-01; revision: 1; test date: 2026-09-19 Ensures that the calibration is repeatable, documented, and technically defensible
Reference Torque Transducer Calibrated torque transducer with a compatible digital indicator Capacity must cover the test range; calibration certificate must be current and traceable to national or international measurement standards Capacity: 250 N·m; certificate uncertainty: ±0.25% of reading; valid calibration status: confirmed Provides the reference value against which the wrench indication is compared
Torque Loading System Rigid torque calibration bench, reaction fixture, and controlled loading mechanism Apply torque smoothly without shock, side loading, bending, or contact with the wrench handle during measurement Loading rate: approximately 10–20 N·m/s; wrench aligned with the transducer axis Reduces dynamic effects and alignment errors that can distort the torque reading
Measurement Range Defined test points across the usable operating range Use at least three points, commonly 20%, 60%, and 100% of nominal capacity, unless the applicable procedure specifies otherwise 40 N·m, 120 N·m, and 200 N·m Checks performance at low, middle, and high portions of the wrench range
Warm-Up and Exercise Manual or automated preloading cycle Operate the wrench through several controlled cycles before recording results; five cycles are commonly used as a practical laboratory setting Five cycles at approximately 100% capacity, followed by a reset to the first test point Stabilizes mechanical components and reduces initial friction and hysteresis effects
Test Direction Clockwise and counterclockwise testing where the wrench is designed for both directions Test each applicable direction separately; use the correct directional mode on the digital indicator Clockwise: 40, 120, 200 N·m; counterclockwise: 40, 120, 200 N·m Identifies directional differences caused by the mechanism or sensor system
Repeatability Repeated readings at every test point Record a consistent number of readings at each point, commonly five readings per direction and test point Five readings at 40 N·m, five at 120 N·m, and five at 200 N·m in each applicable direction Shows the spread of results and supports a repeatability assessment
Environmental Conditions Temperature- and humidity-monitored laboratory or controlled work area Recommended working condition: 18–28 °C; relative humidity below 70%; avoid drafts, condensation, vibration, and direct sunlight Temperature: 22.4 °C; relative humidity: 48%; vibration: not observed Limits thermal drift and environmental influences on the wrench and reference system
Unit and Display Check Digital display, selectable unit control, battery check, and zero function Use one consistent unit throughout the test; confirm zero before each series and verify that the selected unit is N·m Display unit: N·m; zero deviation before test: 0.02 N·m; battery status: adequate Prevents conversion, zero-offset, and display-resolution errors
Example Measurement Results Reference transducer reading compared with wrench reading Calculate indication error using: (Wrench Reading − Reference Reading) ÷ Reference Reading × 100% 40 N·m reference / 40.3 N·m wrench: +0.75%; 120 / 119.4 N·m: −0.50%; 200 / 201.2 N·m: +0.60% Provides a transparent basis for evaluating indication accuracy
Measurement Uncertainty Uncertainty budget including transducer, indicator, repeatability, resolution, temperature, alignment, and loading effects Report expanded uncertainty with the coverage factor and confidence level; a coverage factor of k = 2 is commonly used for approximately 95% coverage Expanded uncertainty: ±0.80% of reading, k = 2 Prevents a false pass or fail when the measurement uncertainty is significant
Acceptance Decision Manufacturer’s declared tolerance, customer specification, or applicable standard-based limit Do not apply a generic pass/fail limit without identifying the governing specification; record the decision rule used Declared limit: ±2.00%; maximum observed error: +0.75%; decision: Pass, subject to the documented uncertainty rule Makes the calibration conclusion traceable and suitable for quality records
Calibration Record Calibration certificate or electronic report Include tool identification, range, serial or asset number, date, operator, environmental conditions, reference equipment, readings, errors, uncertainty, and next due date Status: calibrated; recommended review interval: based on use, risk, history, and applicable quality procedures Creates an auditable record and supports future trend analysis
Note: The example readings and conditions illustrate a documented calibration plan. The final pass/fail limit must come from the applicable specification, customer requirement, or documented calibration procedure.

How to Prepare and Inspect the Torque Wrench

Before calibrating a digital torque wrench, prepare the tool and the workspace carefully. ISO 6789:2017 describes testing at 20%, 60%, and 100% of the wrench’s rated capacity. It also uses five readings at each test point. Place the wrench in a stable, temperature-controlled area. Avoid direct sunlight, vibration, and oily gloves. Let the wrench rest until its temperature matches the room. A cold tool can behave differently.

Inspect the housing, display, drive square, cable, and battery compartment. Look for cracks, bent parts, loose buttons, or damaged seals. Rotate the drive smoothly by hand, without applying force. Confirm that the display returns to zero. Check the selected measurement unit and operating mode. Remove any visible dirt from the drive and handle, but do not spray cleaner into the electronics. Small details matter.

A practical check should include the calibration certificate, serial identification, and stated measurement uncertainty. EURAMET cg-14 recommends recording environmental conditions and loading data for torque measurements. Record the temperature, humidity, operator, test equipment, and every reading. I sometimes find that the wrench looks perfect but has a drifting zero. That is easy to miss. If the zero changes repeatedly, stop the test and investigate before adjusting anything. A rushed inspection creates questionable data. Calibration should begin with evidence, not assumptions.

How to Calibrate a Digital Torque Wrench Accurately: Preparation and Inspection

Example verification results for a 200 N·m digital torque wrench tested at five target points. Before calibration, inspect the housing, display, buttons, drive, battery, and mechanism, then allow the wrench to stabilize at room temperature. The chart compares indication error with a ±4% screening limit; always use the applicable standard or manufacturer specification for final acceptance.

Positive values indicate readings above the target torque, while negative values indicate readings below the target torque. All example readings remain within the illustrated screening limits.

How to Perform a Step-by-Step Calibration Check

How to Calibrate a Digital Torque Wrench Accurately?

A careful calibration check begins with a clean, stable workbench and a certified reference torque transducer. Let both instruments reach room temperature before testing. Check the wrench for cracks, damaged buttons, loose fittings, or a weak battery. Set the correct measurement unit, then confirm the display returns to zero without applied force. Small details matter.

Connect the wrench to the reference device in a straight line. Avoid side loading or sudden movements. Apply torque gradually at 20%, 60%, and 100% of the wrench’s rated range. Hold each target briefly, then record the displayed value. Repeat every point at least three times. Compare the readings with the permitted tolerance in the manufacturer’s technical documentation or your workplace calibration procedure. If results change noticeably between cycles, stop and investigate. The tool may need professional adjustment.

Tips: Keep the handle centered. Pull smoothly. Do not test above the rated capacity. Record temperature, date, test points, and measurement results. A practical mistake is rushing the first cycle; it can create misleading readings. I have found that a short pause between measurements improves repeatability. Still, no manual check is perfect. When accuracy is critical, use an accredited laboratory and retain the calibration report.

How to Record Results and Maintain Calibration Accuracy

Accurate calibration does not end when the wrench passes the test. The record is part of the measurement. ISO 6789:2017 requires documented calibration procedures, applied torque values, measurement results, and uncertainty information. Record the tool identification, operator, date, ambient temperature, test points, direction, and laboratory equipment used. Include the pre-test condition, such as click function, scale damage, or contamination.

Use a controlled worksheet or electronic log. Enter each reading immediately, not from memory. A practical record should show the target torque, actual result, error percentage, and acceptance limit. NIST Handbook 105-2 emphasizes traceability, documented methods, and uncertainty evaluation for reliable calibration work. Keep the calibration certificate with the raw readings. A certificate without supporting data is weaker evidence.

Review trends over time. Compare repeated results at low, middle, and high torque settings. A wrench may remain within tolerance while slowly drifting toward one limit. That warning deserves attention. I once treated a passing result as proof of perfect accuracy. It was not. The next inspection revealed inconsistent handling during testing. Now, operators record warm-up cycles and seating conditions. Store records securely, with revision history and restricted editing. Set the next calibration date according to usage, risk, and previous stability, rather than habit alone. Recheck the wrench after impact, overload, repair, or long storage. Small recording gaps can undermine otherwise careful measurements.

FAQS

What should be checked before calibrating a digital torque wrench?

Use a clean, stable workbench and a certified reference torque transducer. Let both instruments reach room temperature. Inspect cracks, damaged buttons, loose fittings, and battery condition. Select the correct measurement unit. Confirm the display returns to zero without force. Small details matter.

How should the wrench connect to the reference device?

Connect both devices in a straight line. Keep the handle centered. Avoid side loading and sudden movements. Pull smoothly and steadily. Poor alignment can distort the reading.

Which torque points should be tested?

Test approximately 20%, 60%, and 100% of the rated range. Hold each target briefly. Never exceed the wrench’s rated capacity. Record every displayed value immediately. Do not rush the first cycle.

How many times should each test point be repeated?

Repeat every test point at least three times. Compare the readings from each cycle. A short pause can improve repeatability. If results change noticeably, stop and investigate. The wrench may need professional adjustment.

What information should a calibration record include?

Record the tool identification, operator, date, and ambient temperature. Include torque direction, test points, and reference equipment. Note the pre-test condition, including contamination or scale damage. Record the target torque and actual result. Add the error percentage and acceptance limit.

Why are raw readings important?

A certificate alone provides limited supporting detail. Keep it with the original readings and worksheet. Use a controlled paper form or electronic log. Enter results immediately, not from memory. Include measurement uncertainty information. Records are part of the measurement.

How can repeated results reveal future problems?

Compare low, middle, and high torque results over time. A wrench can pass while drifting toward one tolerance limit. That pattern deserves attention. A passing result is not perfect proof. I once overlooked inconsistent handling during testing. The later inspection exposed it.

When should calibration be repeated or professionally reviewed?

Recheck the wrench after impact, overload, repair, or long storage. Set the next date using usage, risk, and previous stability. Do not rely on habit alone. Use an accredited laboratory when accuracy is critical. Keep the final report securely. Small recording gaps can weaken careful work.

Conclusion

Calibrating a digital torque wrench accurately means comparing its displayed torque values with known reference measurements and adjusting or documenting the tool so it delivers dependable results. To understand how to calibrate a digital torque wrench accurately, work in a stable environment with a certified torque tester or calibration device, suitable adapters, a clean work surface, and conditions that minimize temperature, vibration, and contamination. The reference equipment should have appropriate capacity and valid calibration documentation.

Before testing, inspect the wrench for damage, loose components, worn drive parts, low battery power, and a clear display. Allow the tool to reach room temperature, reset it according to its instructions, and select several test points across its working range. Apply torque smoothly and consistently, repeat each measurement, and compare the readings with the accepted tolerance. Record the target values, displayed results, deviations, date, operator, and equipment used. If results fall outside tolerance, remove the wrench from service for professional adjustment or repair, then retest it. Store the wrench properly and schedule regular calibration checks based on usage and working conditions.

Mason

Mason

Mason is a seasoned marketing professional with a deep expertise in the company's offerings and a passion for driving brand awareness. With a strong background in digital marketing strategies, he has an innate ability to connect with diverse audiences and effectively communicate product benefits.......