Karam Tools
Choosing a blade for hardwood is not just about buying the one with the most teeth. Oak, maple, and cherry can reveal every mistake: a scorched edge, chipped grain, or a cut that wanders. This guide to how to choose the right saw blade for hardwood starts with the cut you need, then considers tooth geometry, blade material, kerf, and your saw’s limits.
Norm Abram, the longtime woodworking educator, is often associated with the shop maxim, “Measure twice, cut once.” The same care applies to blade choice: check your saw’s arbor size and maximum blade diameter, then match the blade to ripping, crosscutting, or general-purpose work. A sharp, clean blade matters. So does a steady feed rate. For instance, a fine-tooth crosscut blade can leave a smoother edge across maple, while a ripping blade clears long-grain cuts more efficiently. Exact results vary with the wood and machine.
The tips ahead explain what to inspect on the blade label and how tooth count, grind, and kerf affect the cut. They also cover practical details, such as slowing down when hardwood begins to burn and making a test cut on scrap. Not every recommendation is universal; even experienced woodworkers sometimes need to adjust. That’s worth remembering. A careful test can tell you more than a confident guess.
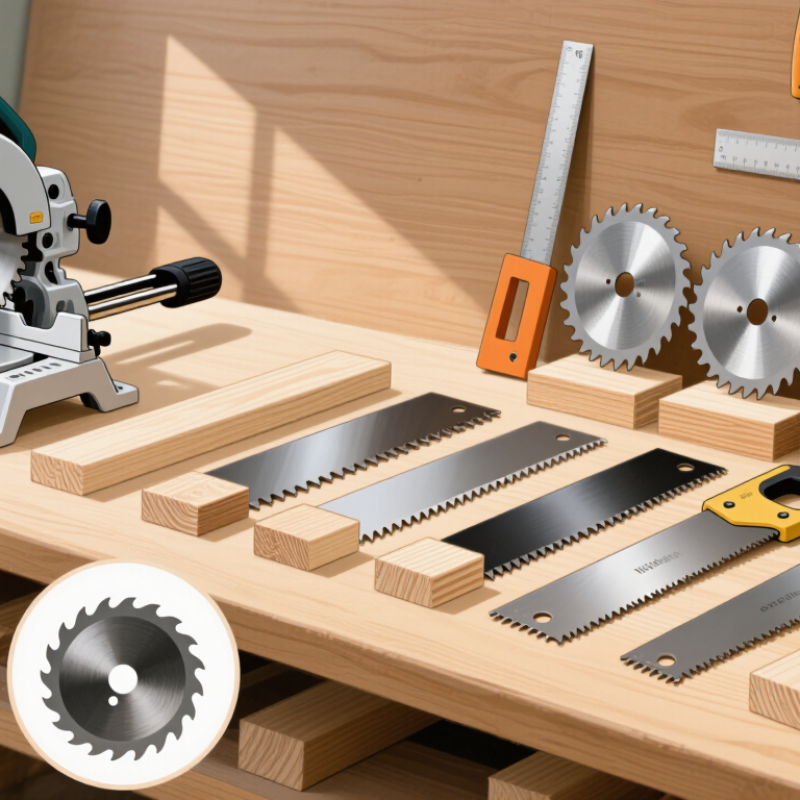
Before choosing a blade, identify the hardwood species and inspect the board’s grain, thickness, and moisture. Oak and maple can feel very different under the same blade. Look for knots, reversing grain, and checks near the cut line; each can increase tear-out or deflection. A species name alone is not enough.
Moisture matters. The USDA Forest Products Laboratory’s Wood Handbook (FPL-GTR-282, 2021) places the average fiber-saturation point near 30% moisture content. Below that point, changing moisture affects wood strength and dimensions, though species vary. A damp board may cut differently from conditioned stock. Test an offcut.
Match the blade to the cut. Rip cuts follow the grain and usually benefit from fewer teeth and larger gullets that clear chips. Crosscuts sever fibers, so more teeth can leave a cleaner edge. For a cabinet panel, a rough test cut may expose splintering before the final pass. Check the blade’s stated maximum speed, kerf, and cutting depth against the saw and stock. I would not assume a “hardwood” setting solves everything; grain direction can still surprise you.
Janka hardness measures the force needed to embed a steel ball halfway into wood; higher values indicate harder wood. Use it as one factor when assessing your material—not as a direct blade specification. For harder hardwoods, choose a sharp, suitable blade and match the tooth design to the cut: fewer teeth for faster ripping, more teeth for smoother crosscuts.
Janka values shown in pounds-force (lbf). Values are commonly cited species averages and can vary by sample and growing conditions.
Match blade type to the cut, not merely to the word hardwood. A rip blade’s larger, fewer teeth clear chips along the grain. A crosscut blade’s finer tooth pattern severs fibers across it. For mixed work, a combination blade reduces changes, though its finish may not match a dedicated blade. The USDA Forest Products Laboratory’s Wood Handbook (FPL-GTR-282, 2021) reports basic specific gravity of about 0.60 for white oak and 0.63 for hard maple. These figures show why hardwoods should not be treated alike: denser stock can put more demand on a dull blade. Keep the feed steady. Never force it.
Diameter and arbor size are essential fit checks. Use the diameter specified for your saw; a larger blade can interfere with the guard and alter cutting depth. Check the arbor size in the saw manual, then confirm the blade seats flat and securely before mounting. A 10-inch blade with a 5/8-inch arbor works only if both dimensions match the machine. Check kerf compatibility with the saw’s riving knife, too. I still recheck it. Labels are easy to misread, and a snug-looking fit is not proof of a correct one.
Tooth count affects both finish and feed rate. A 24-tooth blade clears chips quickly when ripping thick hardwood, while a 60-tooth blade usually leaves cleaner crosscuts. Too many teeth can trap dust and heat the cut. Not ideal. For a general-purpose blade, around 40 teeth is a practical compromise, though stock thickness and saw speed matter.
Tooth geometry should match the cut: alternate-top-bevel teeth score fibers for cleaner crosscuts; flat-top teeth suit ripping along the grain. Hardwood density also varies by species. The USDA Forest Products Laboratory’s 2021 Wood Handbook reports basic specific gravity of about 0.56 for northern red oak and 0.63 for sugar maple. That difference can affect cutting resistance, so test on offcuts rather than trusting tooth count alone. Carbide-tipped blades generally hold an edge longer than plain steel blades in frequent hardwood work. Check the cut face: burning may signal a dull blade, slow feed, or a poor match. It is not always the blade.
Source: USDA Forest Products Laboratory, Wood Handbook—Wood as an Engineering Material, FPL-GTR-282.
A hardwood blade only works well when it fits the saw. Check the manual for blade diameter, arbor size, and maximum rated speed. The blade must match all three. Fit comes first. A finer tooth count can leave a cleaner edge in oak or maple, but sharpness and a steady feed also matter. I once nearly overlooked an arbor measurement while comparing blades; it is an easy detail to check, not one to guess.
Tips: Measure the blade and arbor before buying. Confirm the blade’s speed rating meets or exceeds the saw’s rating. Use a blade intended for that saw type; table saws and circular saws have different requirements. Keep the guard in place and working properly.
Before changing a blade, disconnect the saw from power and wait for the blade to stop completely. Wear eye and hearing protection, secure the hardwood, and keep hands away from the cutting path. Stand where kickback is less likely to send the workpiece toward you. If the cut feels forced or the blade binds, stop and reassess the setup. A rushed cut can hide a poor fit or an unstable board.
After fitting a blade, make a test cut in a hardwood offcut with similar grain and moisture. Check both faces under a bright work light. Fuzzy fibers, burn marks, or a wandering kerf can point to a dull blade, poor alignment, or an unsuitable feed rate. Change one factor at a time; changing everything makes the result hard to read. Keep the offcut. It gives you a useful comparison after sharpening or blade changes.
Moisture matters, too. The USDA Forest Products Laboratory’s Wood Handbook (FPL-GTR-282, 2021) puts wood’s average fiber-saturation point near 30% moisture content, while noting species variation. Below that point, wood shrinks as it dries, which can affect fit and cut quality. Record the lumber’s moisture reading when possible, and test on stock from the same batch. A blade that feels dull may instead be dirty with resin or pitch. Unplug the saw before cleaning, and follow its manual. Inspect teeth for damage, then use a suitable cleaner and a soft brush. Don’t rush this part. I sometimes judge a blade by one rough cut; that’s a weak test. A second cut after cleaning can tell a different story.
A 24-tooth blade can clear chips quickly when ripping thick boards. Around 40 teeth is a useful general-purpose compromise.
A 60-tooth blade often leaves a cleaner crosscut. Too many teeth can trap dust and create heat. Not always better.
Alternate-top-bevel teeth help score fibers for cleaner crosscuts. Flat-top teeth are suited to cutting along the grain.
Yes. Oak and maple can offer different cutting resistance. Test the blade on an offcut rather than relying on tooth count alone.
Carbide-tipped blades generally hold an edge longer than plain steel blades. Check the cut face for burning; a dull blade or slow feed may be responsible.
Check the saw manual for blade diameter, arbor size, and maximum rated speed. Match all three. Fit comes first.
Disconnect the saw from power and wait for the blade to stop completely. I would double-check the arbor measurement; it is easy to overlook.
Keep the guard working, secure the board, and wear eye and hearing protection. Keep hands clear of the cut path.
Stop and reassess the setup. Check the blade fit and board stability before continuing. A rushed cut can hide a problem.
Choosing the right blade begins with understanding the hardwood, its thickness, grain, and the kind of cut you need, whether it is a fast rough cut or a smooth finish. Consider the blade type, diameter, and arbor size, and make sure each measurement is compatible with your saw. To decide how to choose the right saw blade for hardwood, compare tooth count and geometry: more teeth and a suitable tooth shape can help produce cleaner edges, while the blade material should be appropriate for the work and expected use.
Before cutting, confirm that the blade is securely fitted and that the saw’s safety instructions are followed. Make a test cut on a scrap piece to check the finish and adjust your setup if needed. Keep the blade clean, inspect it for wear or damage, and maintain it regularly. Matching the blade to both the material and the task helps support accurate cuts, reliable performance, and safer working habits.
