Karam Tools
Porcelain tile looks clean and durable, yet its dense body can punish rushed cutting. A small pressure change may leave a chipped corner, a rough glaze line, or an edge that catches light. This guide explains how to cut porcelain tile without chipping the edges, using controlled pressure, proper support, and the right diamond blade.
Tile educator and author Tom Meehan offers a practical reminder: “Let the saw do the work; never force the tile.” That principle matters when using a wet saw. A continuous-rim porcelain blade, steady water flow, and a firm cutting table create a more predictable result. Mark the cut with a fine pencil or painter’s tape. Support both sides of the tile. Feed it slowly, especially near the final inch.
Small details matter.
In real installations, even experienced setters make mistakes. A blade can become dull, a tile can shift, or the final pass can move too quickly. I would not treat one successful cut as proof that the method is perfect. Test a spare piece first. Check the cut under strong light. If the edge still flakes, reduce pressure, verify blade condition, and improve tile support. For visible edges, a polishing pad or rubbing stone may still be necessary. The goal is not speed. It is a clean, repeatable cut that survives close inspection.
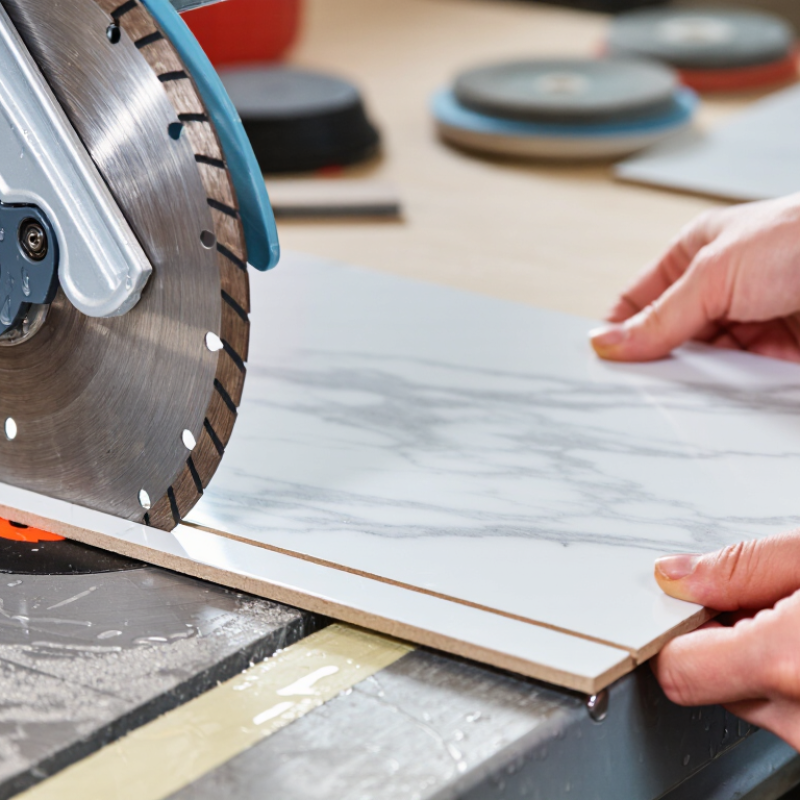
Porcelain tile chips because it is dense, hard, and brittle. Its glazed surface can fracture when the blade vibrates or meets the edge too aggressively. A dull or unsuitable blade adds heat and pressure instead of cutting cleanly. Tiny flaws in the tile can also become visible chips. It happens fast.
Support the tile fully on a stable, flat surface, especially near the cut line. Use a sharp, continuous-rim diamond blade rated for porcelain, and keep the saw’s water flow steady. Water cools the blade and helps carry away abrasive dust. Feed the tile slowly, without forcing it; a change in motor pitch can signal too much pressure. Let the blade do the work. Wear eye protection, and follow the tool’s safety instructions.
FINAL CUT The final inch often needs extra care because the narrow offcut can break away unevenly. Keep both sides supported and ease the feed as the blade exits. For a manual cutter, make one firm, continuous scoring pass, then snap the tile with even pressure. Check the edge in side light before installation. Even with careful setup, a small fleck may remain; I would rather inspect each cut than assume it is perfect.
Porcelain is dense, so the blade matters more than speed. Choose a continuous-rim diamond blade labeled for porcelain tile, and check that its diameter and arbor fit your saw. A segmented blade may cut quickly, but its rougher contact can leave small chips along a visible edge. Small detail. Big difference.
For long, straight cuts, a wet tile saw is usually the steadier choice. Water cools the blade and carries away much of the fine dust. Set the tile flat against the fence, with the finished face positioned according to your saw’s instructions.
Feed it slowly and evenly; forcing the tile can make the edge wander or fracture. Keep the water flowing. If you only need a small notch or curved cut, a diamond blade on an angle grinder can work, but it takes a steadier hand and often leaves a rougher edge. Wear eye protection and follow the tool’s safety guidance.
Match the tool to the cut, not just the tile. A manual snap cutter may suit some porcelain, but dense or textured tiles can resist a clean score-and-snap. Test your setup on an offcut when possible. I still find that tiny adjustments to feed pressure matter, and the right setting can vary between tiles. Inspect the cut before installing it; a little edge polishing may help, but it cannot hide every chip.
Before cutting porcelain tile, let it reach room temperature and wipe away dust. A clean surface makes the mark easier to see. Use a fine pencil and a square to draw the cut line across the glazed face. If the glaze is glossy, a strip of masking tape can make the line more visible and help support the surface. Measure twice, then check which side of the line the blade will remove. The blade takes a little material; forgetting that detail can leave a piece just short.
Set the tile on a stable cutting table with the marked line aligned to the blade. Support the tile on both sides of the cut, especially near narrow edges. Use padded clamps if needed, tightening only enough to stop movement. Too much pressure can crack the tile. I’ve found that even slight rocking can cause a rough edge, so check the setup before switching on the saw. It can feel fussy. That pause is useful.
Tips: Keep your hands clear of the blade and follow the saw’s instructions. Feed the tile steadily; forcing it can chip the glaze. If the cut begins to wander, stop and reassess rather than pushing harder. A small test cut on a spare piece can reveal whether the tile is supported well and the blade is tracking cleanly.
| Step | Recommended Method | Practical Guideline | Why It Reduces Chipping |
|---|---|---|---|
| 1. Inspect the tile | Check the glazed face, back, corners, and any existing hairline cracks before marking. | Reject tiles with visible damage near the planned cut whenever possible. | Pre-existing cracks can spread under cutting pressure and cause irregular breakouts. |
| 2. Measure and mark | Mark the cut line on the glazed surface with a fine wax pencil or suitable tile marker. | Measure from the finished reference edge and account for the planned joint or trim gap. | A precise line prevents repeated passes and limits unnecessary stress on the edge. |
| 3. Reinforce the mark | Place a narrow strip of low-residue masking tape over the marked area when the glaze is especially prone to flaking. | Remark the cut line clearly on top of the tape and remove the tape after cutting. | The tape helps stabilize the surface glaze and makes the cut line easier to follow. |
| 4. Support the tile | Place the tile flat on the saw table or on a stable, continuous support surface. | Keep the tile supported on both sides of the cut whenever the equipment allows it. | Even support reduces vibration, bending, and sudden breakage at the exit point. |
| 5. Secure the tile | Use the saw guide, a non-slip mat, or a properly positioned clamp where compatible with the tool. | Keep hands away from the blade and never clamp directly onto a fragile glazed corner. | Preventing movement keeps the blade aligned with the mark and avoids side loading. |
| 6. Select the blade | Use a continuous-rim diamond blade intended for dense ceramic or porcelain tile. | Use a blade that is clean, straight, and compatible with the saw’s diameter and speed rating. | A continuous rim generally produces a smoother edge than an aggressive segmented cutting edge. |
| 7. Use water when appropriate | Use a wet-cutting setup with a steady flow of clean water if the saw is designed for wet cutting. | Confirm that water reaches the cutting area and keep the reservoir free of excessive tile slurry. | Water cools the blade, controls dust, and helps maintain consistent cutting performance. |
| 8. Start the cut | Let the blade reach full operating speed before contacting the tile. | Begin with light, controlled pressure instead of forcing the tile into the blade. | A gradual entry reduces impact on the glaze and prevents the blade from wandering. |
| 9. Maintain a steady feed | Move the tile smoothly along the guide at a consistent, moderate rate. | Do not twist, stop abruptly, or push harder when the blade reaches a denser section. | Consistent pressure limits vibration and reduces uneven chipping along the cut. |
| 10. Finish the exit | Support the offcut and slow the feed slightly as the blade approaches the far edge. | Avoid allowing the offcut to fall or lever downward before the cut is complete. | The final few millimeters are a common point for edge breakout and corner damage. |
| 11. Smooth the edge | Lightly dress the cut edge with a diamond hand pad or suitable abrasive stone. | Use several light passes and remove only the sharpness or small high spots. | A light finish improves handling safety and gives the cut edge a cleaner appearance. |
Cutting porcelain tile cleanly depends less on force and more on patience. I have found that rushing the final few inches causes most edge chips. Use a sharp diamond blade designed for porcelain, and check that water flows steadily across the cutting area. Wear suitable eye and hearing protection, even during short cuts.
Support the tile firmly on both sides of the blade. The surface should stay flat, without rocking or bending. Mark the cut clearly, then guide the tile forward with slow, consistent pressure. Let the blade do the work. Do not push harder when the motor sounds strained. That usually creates heat, vibration, and a rough edge. Keep both hands controlled, but never place them near the blade path.
Slow down near the exit.
The last section needs extra care because the remaining tile can break suddenly. Continue supporting the narrow piece until the blade passes completely through it. If the edge still chips, inspect the blade, water flow, and tile support before changing your technique. I once blamed my cutting speed, but the real problem was a slightly uneven support surface. A small adjustment made the next cut noticeably cleaner. Some tiles remain unpredictable, so test your method on a spare piece first.
After cutting porcelain tile, do not trust the edge by touch alone. Fine chips can hide beneath a smooth-looking surface. I wipe away the slurry and examine the cut under a bright, angled light. This reveals tiny pits, pale stress lines, and uneven sections near the corners.
I smooth the edge with a diamond hand pad, using steady strokes along the cut line. A light touch works better than forcing the abrasive. I usually begin with a medium grit and finish with a finer pad for visible edges. Keep the pad flat against the tile. Tilting it can create a hollow spot or soften one corner too much.
Feel it again.
The edge should feel consistent from end to end, without a sharp lip. I also place a straightedge beside the cut and check for dips. On narrow strips, I inspect both faces because pressure can damage the glazed side. I once accepted an edge that looked acceptable in dry light, but installation revealed several small chips. That mistake taught me to inspect every cut after cleaning, not before. If a defect remains, remove it carefully rather than hiding it with excessive grout. Porcelain can appear unforgiving, yet patient finishing usually makes the difference. Inspecting under different light is slightly tedious, but it prevents unreliable judgments.
Use a continuous-rim diamond blade designed for porcelain tile. Check the blade diameter and arbor size before cutting. Small detail. Big difference.
A wet tile saw usually offers steady control. Water cools the blade and carries away much of the fine dust.
Guide the tile slowly with consistent pressure. Let the blade do the work. Forcing it can cause heat, vibration, or fractures.
Support the tile firmly on both sides of the blade. Slow down near the exit. Keep supporting the narrow piece until the blade passes through.
Yes, a diamond blade can handle small notches and curved cuts. It requires a steady hand and may leave a rougher edge.
Yes. Test the setup on an offcut when possible. Tile density and texture can change how cleanly the blade cuts.
Wipe away the slurry and examine the edge under bright, angled light. Look for pits, stress lines, chips, and uneven corners.
Use a diamond hand pad with steady strokes. Start with medium grit, then use a finer pad on visible edges. Feel it again.
Check the blade, water flow, and support surface first. I once blamed my cutting speed, but uneven support caused the problem. Some tiles remain unpredictable.
Porcelain tile can chip when it is cut with a dull or unsuitable blade, moved during cutting, or forced through the tool too quickly. To learn how to cut porcelain tile without chipping the edges, begin by choosing a sharp blade designed for porcelain and a cutting tool that suits the size and shape of the cut. Mark the cutting line clearly, then secure the tile on a stable, well-supported surface so it cannot shift or vibrate.
Cut slowly and steadily, keeping consistent support beneath the tile throughout the process. Avoid pressing too hard; letting the blade do the work helps reduce stress on the edges. Once the cut is complete, inspect it for rough spots or small chips. Smooth the edge gently with an appropriate abrasive, taking care not to remove more material than necessary. A careful setup and patient cutting technique can help produce a cleaner, more even finish.
