Karam Tools
Choosing a first welding process can feel less like picking a tool and more like learning a new language. MIG welding feeds wire through a gun, creating a steady arc that suits many basic repair and fabrication jobs. TIG welding uses a separate filler rod and a foot pedal or fingertip control, demanding steadier hands but offering precise control. On a practice coupon, that difference is visible: MIG can lay down a bead quickly, while TIG rewards patience and careful timing.
So, what is the difference between mig and tig welding for beginners? In practical terms, it is a trade-off between speed and control, with equipment, material thickness, and intended projects also shaping the decision. Welding educator Jody Collier is known for practical, hands-on instruction. I can’t verify a verbatim quotation from him on this exact comparison, so this is an editorial paraphrase, not his direct quote: “Match the process to the job, then build skill through practice.” A useful reminder. Neither process makes every weld easy.
This guide compares learning curves, setup costs, common materials, and the mistakes new welders often meet. You’ll see where MIG feels forgiving, where TIG’s precision matters, and what each process asks of your attention. The best choice may depend on your workspace, budget, and first project—not a universal ranking. Expect trade-offs. Even a neat-looking bead can hide weak fusion, so practice and inspection matter.
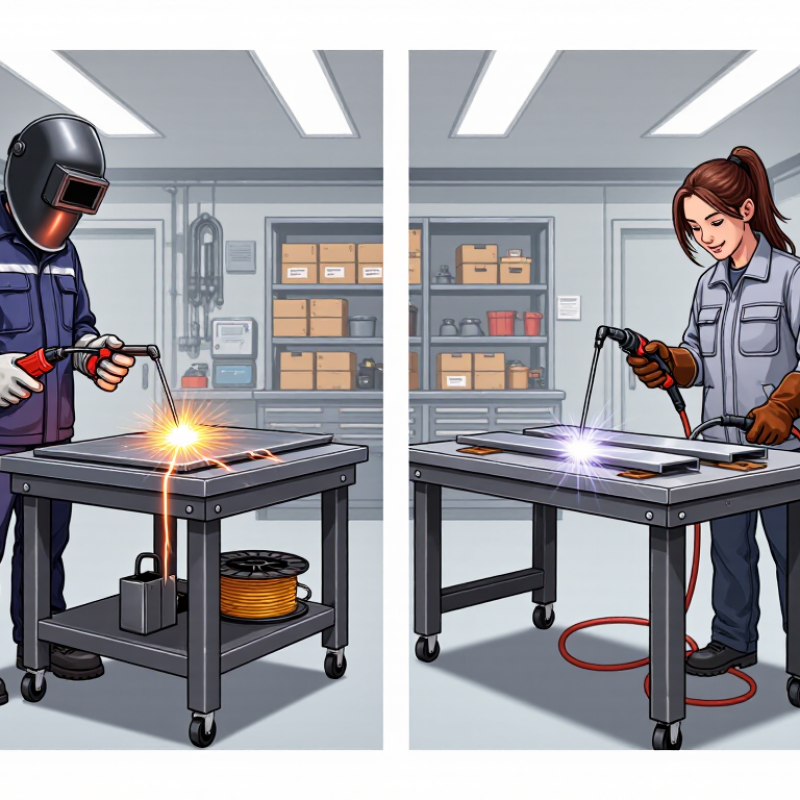
MIG welding, technically gas metal arc welding, uses a spool of continuously fed metal wire as its electrode. An electric arc melts the wire and the edges of the workpiece, joining them as the weld cools. Shielding gas flows through the welding gun to protect the hot metal from air. The wire feed and arc start together when the trigger is pressed. You can hear a steady crackle and see a small pool of liquid metal. It is a practical process for many mild-steel projects, though setup still matters.
TIG welding, or gas tungsten arc welding, uses a tungsten electrode to create the arc. Unlike MIG wire, the tungsten does not normally melt into the joint. The welder may add filler metal separately with a thin rod, or join thin pieces without filler. Shielding gas protects the arc and hot weld area. One hand guides the torch; the other feeds filler when needed. A foot pedal can adjust the current on some equipment. It takes coordination.
The basic difference is the source of the weld metal: MIG feeds it automatically, while TIG gives the operator more control over adding it. That sounds simple. In practice, both processes depend on clean metal, steady movement, and suitable settings. A beginner may expect the machine to do most of the work, but even a short bead reveals uneven hand speed. The distinction is useful, not absolute: material thickness and the job shape also influence which process fits.
MIG welding joins metal with an electric arc between the workpiece and a continuously fed wire.
The wire melts and becomes the filler metal. Shielding gas flows from the torch to protect the hot weld from air. When a beginner squeezes the trigger, wire feeds forward and the arc starts. The setup can feel forgiving because the wire keeps moving, but travel speed still matters. Move too quickly, and the bead may look narrow or fail to fuse properly. Move too slowly, and excess metal can pile up. A short practice bead on clean scrap often reveals more than staring at machine settings.
TIG welding uses a non-consumable tungsten electrode to create the arc.
The welder usually adds filler metal by hand with the other hand, while shielding gas protects the weld area. On thin sheet, a foot pedal can adjust heat as the workpiece warms. Some joints can be fused without added filler. That sounds simple, but coordinating the torch, pedal, and filler rod takes patience. My early TIG beads would often wander when I watched the puddle too intensely. It helps to keep a steady torch angle and make small, deliberate movements. Both processes need clean metal, suitable protective gear, and good ventilation; neither replaces careful preparation.
For a beginner, MIG welding usually needs a power source, wire feeder, welding gun, and shielding gas. The wire feeds continuously, so you can focus on guiding the gun and keeping a steady pace. It often suits mild steel and some aluminum, but the correct wire, gas, and machine setup depend on the material. Keep the metal clean; paint, oil, and rust can spoil the weld. A common mistake is turning up the power to compensate for poor technique. It rarely fixes the real problem.
TIG equipment includes a power source, torch, tungsten electrode, and usually a separate filler rod. Many setups also use a foot pedal to control current. TIG can produce neat welds on thin stainless steel, mild steel, and aluminum, but each material calls for suitable settings and preparation. The process asks more of your hands: one controls the torch while the other feeds filler. That coordination takes practice. Slowly.
Both methods require a suitable helmet, gloves, protective clothing, and good ventilation. MIG may feel easier at first, though its welds still need consistent travel and wire placement. TIG offers finer control, but clean preparation and steady timing matter. Beginners sometimes expect one process to suit every job. It doesn’t. Compare the materials you’ll actually weld, your budget for equipment, and the time you can spend practicing on scrap before choosing.
2026 MIG vs TIG Welding for Beginners: Which Is Best?
MIG vs. TIG: Speed, Weld Quality, Cost, and Versatility
MIG welding feeds wire continuously, so beginners can focus on travel speed and torch angle. It often joins common steel projects quickly, especially when parts are clean and fitted closely. That matters. The tradeoff is more spatter and wire cleanup, and a fast bead can hide poor penetration. Practice on scrap before judging the result.
TIG welding is slower, but it offers precise heat control and neat-looking beads. One hand guides the torch; the other adds filler, which can feel awkward at first. Thin sheet metal benefits from that control, though appearance alone does not prove a strong weld. TIG equipment and setup can cost more, while filler rods, tungsten, and shielding gas add ongoing expense.
Neither process wins every job. MIG handles many workshop repairs and thicker steel efficiently; TIG suits delicate work and can join several metals with the right setup. Aluminum, for example, requires compatible equipment and technique. I would not choose by appearance alone. Compare the material, thickness, and amount of welding you expect to do. Beginners often underestimate preparation: removing paint, rust, and oil can improve either process more than buying extra accessories.
A beginner-focused comparison of speed, weld quality, cost, and versatility
Ratings are comparative beginner-oriented assessments on a 1–5 scale, not standardized measurements. MIG is generally faster to learn and use, making it a practical starting point for many general-purpose projects. TIG offers greater control and cleaner-looking welds, but typically takes more practice and coordination. Actual equipment costs and results vary with the machine, materials, setup, and project.
For beginner projects in 2026, choose the welding process around the material, thickness, and finish you need. MIG is often a practical match for a garden cart, simple steel brackets, or a small repair on thicker mild-steel tubing. Its steady wire feed helps beginners keep moving along a joint, though poor fit-up can still leave gaps or uneven beads. Fit-up matters more. Clean the metal and clamp the pieces firmly before practicing on scrap of similar thickness.
TIG suits projects where control and a neat finish matter, such as thin stainless-steel panels or carefully joined tubing. It can also handle aluminum with suitable equipment and practice, but coordinating the torch, filler rod, and foot control takes patience. Slow down here. For a first project, a small, flat practice piece is less frustrating than a decorative frame with awkward corners. Many beginners focus too much on appearance and overlook joint preparation; that is an easy mistake to make. Use appropriate eye and skin protection, and provide effective ventilation. Check the equipment instructions for the material and settings you plan to use.
Both processes can produce strong welds when used correctly. For most first-time projects, MIG is easier to learn and quicker to use; TIG is better suited to precise, clean-looking work when you are ready to practice coordinated torch and filler control.
| Comparison | MIG Welding | TIG Welding | Beginner Project Match |
|---|---|---|---|
| Process basics | A continuously fed wire electrode creates the weld. Shielding gas is commonly used; flux-cored wire can be used for some applications without external shielding gas. | A nonconsumable tungsten electrode creates the arc. Shielding gas is used, and filler metal is added separately when needed. | Choose MIG to get started with straightforward joints. Choose TIG when the project calls for greater control over the weld puddle. |
| Learning curve | Generally easier to pick up because the machine feeds wire continuously and both hands are not usually needed to add filler. | Usually takes more practice: the operator controls the torch and may feed filler by hand at the same time. | MIG is a practical first process for learning basic bead placement and joint preparation. TIG is a good next step for deliberate skill-building. |
| Typical pace | Often faster for longer welds and general fabrication because wire feeds continuously. | Typically slower, especially for beginners, since travel and filler addition require careful coordination. | MIG suits a small workbench, cart, or utility frame where efficient joining matters. TIG suits smaller, detail-focused work. |
| Material preparation | Can tolerate some variation in preparation, but clean metal and a well-fitted joint still improve results. Wind can disrupt shielding gas. | Usually demands very clean material and careful fit-up; surface contamination can affect weld quality. | For a first practice project, clean and clamp the parts whichever process you choose. TIG rewards especially careful cleaning. |
| Common beginner materials | Commonly used for mild steel; stainless steel and aluminum are also possible with suitable equipment, wire, shielding, and setup. | Commonly used for steel and stainless steel; aluminum is possible with suitable AC-capable equipment and appropriate setup. | Start with mild-steel practice coupons before moving to a finished project. Material and machine capability determine what is practical. |
| Appearance and control | Can make sound, consistent welds, though the finished bead may be less finely controlled than a well-executed TIG weld. | Offers precise heat and filler control and can produce neat, visible welds when the operator has developed the technique. | Use MIG for functional joints that will be ground or painted. Consider TIG for visible joints where appearance and fine control matter. |
| Beginner-friendly projects | Simple storage rack, garden gate repair, basic steel bracket, small cart, or noncritical workshop stand. | Small stainless-steel tray, thin-wall decorative frame, clean-looking practice coupons, or a small noncritical component. | Begin with nonstructural projects. Avoid pressure vessels, vehicle safety components, lifting equipment, and other safety-critical repairs. |
| Potential frustrations | Wire-feed settings, spatter, burn-through on thin stock, and shielding problems outdoors can take practice to manage. | Maintaining arc length, avoiding tungsten contamination, feeding filler, and preventing heat distortion can be challenging. | Practice on scrap of the same material and thickness before welding the project. Change one setting at a time. |
| Best first choice | Best for many beginners who want to build practical steel projects and learn basic welding efficiently. | Best for detail-focused learners who value precision and are comfortable investing more time in practice. | Pick the process that fits the project, material, available equipment, and practice time—not appearance alone. |
Note: These are general comparisons, not guaranteed settings or capacity limits. Results depend on the welder, material type and thickness, joint design, preparation, and operator skill. Use suitable eye, skin, and respiratory protection, ensure adequate ventilation, and follow the equipment instructions.
MIG feeds filler wire automatically into the weld. TIG uses a tungsten electrode and adds filler by hand when needed. The difference is useful, but the job shape and metal thickness matter too.
Pressing the trigger starts the wire feed and arc together. The wire melts into the joint, while shielding gas protects the hot metal. You may hear a steady crackle.
The tungsten electrode creates the arc but does not normally melt into the joint. One hand guides the torch; the other may feed a thin filler rod. It takes coordination.
No. Some thin pieces can be joined without added filler. Other joints need a rod fed by hand. Small movements help.
MIG may feel more forgiving because its wire feeds continuously. But travel speed still matters. Move too fast, and the bead may be narrow; move too slowly, and metal can pile up.
Uneven movement, unsuitable settings, or unclean metal can affect the bead. A short practice weld on clean scrap can reveal problems. It is more useful than guessing.
You may need to coordinate the torch, filler rod, and foot pedal. My early beads wandered when I stared too intensely at the puddle. I had to rethink that habit.
Clean metal, suitable protective gear, and good ventilation matter for both. Neither process replaces careful preparation. Check the setup, too.
This guide explains what MIG and TIG welding are and how each process creates a weld. MIG welding feeds a wire electrode continuously through a gun, making it relatively quick to learn and well suited to many general-purpose projects. TIG welding uses a separate filler rod when needed and a carefully controlled arc, which can offer greater precision but demands more coordination and practice. Understanding what is the difference between mig and tig welding for beginners starts with comparing how each method works and the equipment, materials, and basic skills it requires.
The article also weighs speed, weld appearance, cost, and versatility to help new welders choose a practical starting point in 2026. MIG may be a good fit for straightforward repairs and larger projects where productivity matters, while TIG can suit thinner materials and detailed work when careful control is a priority. By matching these strengths to beginner-friendly projects, readers can make an informed choice based on their goals, workspace, and willingness to practice.
